Over the course of my studies I've worked on multiple different machines, with different operating systems, different hardware, and different security privileges. It can be a nightmare to ensure a smooth and consistent experience, but when done right, makes working with code and data a pleasure and makes academic reproducibility that much easier. In this article we will look at how the right choice of Python distribution, environment manager, and IDE can go along way to avoiding technological headaches.
The world of Python is rapidly growing and mutating.
This is a great thing for the language and it's users, but also poses the challenge of keeping up-to-date whilst maintaining backwards-compatibility.
Naturally, the Python core evolves at a snails pace.
This means that if you decide to work with pure Python then you are in a safe place.
The most commonly used scientific packages such as numpy, scipy, and pandas can be considered stable and safe, but beyond that there is risk of an update breaking something in your code (and even worse, silently breaking your code).
Below I'll describe my setup which I've reached so far. It is built on the following criteria:
- Usable across multiple machines
- Usable across different operating systems
- Easy to work on different projects/codebases
- Maintain academic reproducibility
- Easy to setup and work with
These are my preferences and thankfully not everyone will agree, so I've listed some alternatives for each where I can.
Installation/Distributions
The most common question for someone first picking up Python is "which Python?". The fundamental Python experience will be the same whichever you use (or if you just use the built-in system Python - although this is not recommended). The difference lies in the ease of installation, the default bundled packages, and some added bonus features.
Anaconda (link)
Anaconda is the go-to distribution for Python. It's the most popular distribution for data science and it's also free and open-source.
Among the many useful features:
- Simple downloader/installer.
- The ability to create and move between different environments to work in (see below).
- The standard distribution comes with a comprehensive scientific stack - everything from numerics to image processing.
- Manages non-Python packages - some Python libraries utilise libraries from C/FORTRAN which can be difficult to install, however not with Anaconda.
- Almost identical experience across Windows/Linux.
- As of recently, the Intel MKL Optimisations come as standard in the distribution.
What this means is that numerical computations in
numpyorscipywill automatically be parallelised to use all available CPU power where possible - without having to change a line of code!
To download, simply visit the link above and follow the instructions.
Enthought Canopy (link)
Canopy is the second largest distribution, and has a more 'MATLAB' feel to it. There is a graphical package manager so managing packages is a doddle. Addition features and add-ons are available through subscriptions and purchases, similar to MATLAB's toolboxes.
WinPython (Windows) (link)
WinPython is a purely Windows installation of Python. Before Anaconda it was probably the most stable way of interfacing Python packages with C/FORTRAN on Windows. With Anaconda it has lost that edge to some extent but is still recommended if you plan to use the high performance computing package, theano.
Virtual Environments
A virtual environment creates a folder which contains all the necessary executables to use the packages that a Python project would need and keeps it in isolation. To see which version of Python you are using you can call
which python
from the command line, or in a python terminal call
import sys
sys.prefix
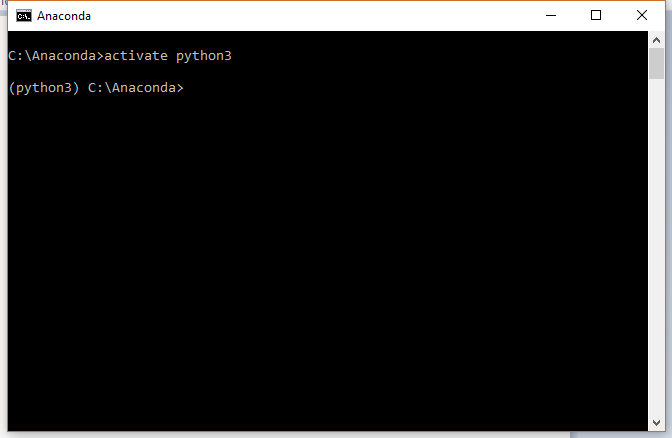
In this case, I'm using a generic environment called python3 which I use for non-project work and quick scripting.
Virtual environments solve many compatibility issues when working on multiple projects which share libraries but might require different versions.
Another classic question asked by new Python users is "which Python should I used? 2 or 3?". My answer is usually "Unless you have been given an explicit reason for using Python2, then use Python3". However that is really no longer the case - with virtual environments you can use both! If your project requires Python2 then you create a Python2 environment in isolation and use that for that project.
Conda environments (link)
The ability to use Conda environments is built-in with the Anaconda installation.
For example, to create a new environment called envname with Python3 call
conda create -n [envname] python=3 [packages]
where [packages] is a list of packages you want to install along with it.
It is recommended that you try and install packages together to avoid potential conflicts between them, however the system is smart enough to recognise when that might happen.
If you forgot to install something then it can be installed later with
conda install --name [envname] [packages]
If you don't specify the environment then packages are installed in the current environment.
There are also a number of different non-Python programs that can be installed through Anaconda such as the graphing software graphviz, or document converter pandoc.
If you've downloaded the full Anaconda distribution then most packages you would need for all but the most specialised analysis come pre-installed.
To activate an environment simply call
source activate [envname]
or on windows
activate [envname]
To deactivate, simply reactivate another environment or call
deactivate
Conda distributions have images for most packages.
However if they don't then all is not lost.
One can simply use pip as you would normally with
pip install [package]
To save an environment, we can export it to a file.
conda env export > environment.yml
This produces a list of all packages used and their version numbers - similar to requirements.txt produced by pip freeze.
To read in an environment its as simple as
conda env create -f environment.yml
I won't list every function here to avoid recreating the official documentation. If you have further questions I suggest you take a look in the documentation linked above.
Finally there are two recent developments worth mentioning.
The first is Anaconda Cloud, a cloud-based solution for all things Anaconda.
Here you can upload environments, files, packages, and notebooks to ensure consistency across different machines and to allow for collaboration.
At the moment I feel like it is a little clunky and superfluous to keeping an environment.yml file, but only time will tell.
Secondly, a number of IDEs now support Conda environments and offer interfaces for using and maintaining environments. If you are a big Jupyter notebook user then the nb_conda extension integrates Conda environments into the notebook. This allows you to spin up different notebooks with different environment kernels in an instant - something that previously required a lot of manual fixes to do.
virtualenv (link)
virtualenv has been around for a while (since 2007 in fact) and functions exactly like Conda environments except that it is limited to managing Python packages only.
Use
pip install virtualenv
to install,
virtualenv [envname]
to create an environment, and
source [envname]/bin/activate
to activate it.
A recent blog post here gives a primer on using virtualenv in far more detail than is given here.
If you are using Conda, then there is no reason not to use Conda environments, however if you're looking for a Python-only solution for Python-only packages then virtualenv fits the bill nicely.
Docker (link)
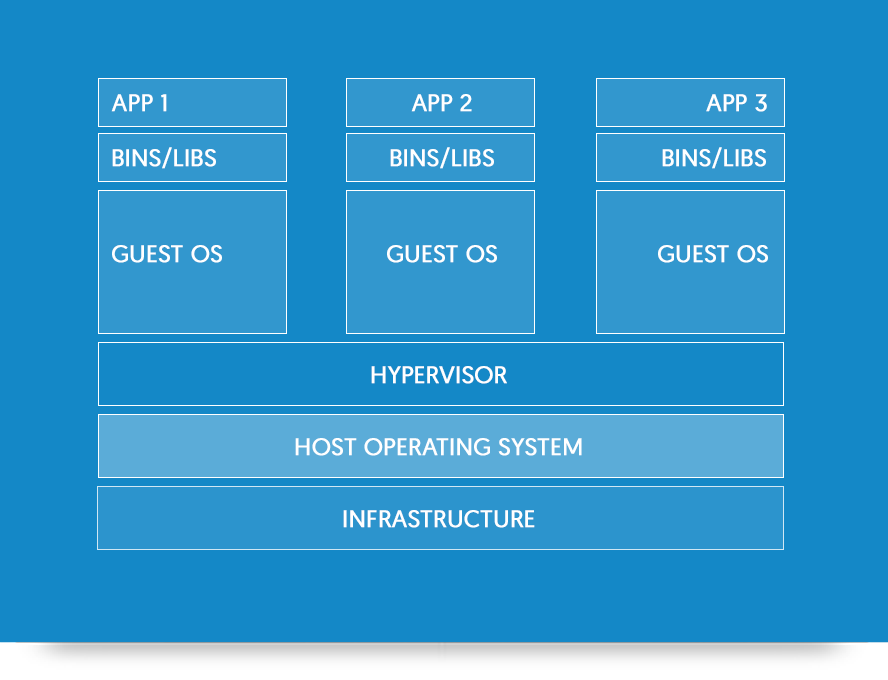
Docker is the extreme of code and environment isolation, being more of a virtual machine than a virtual environment. Unless you are having system compatibility issues (Windows v. Linux, e.t.c.) or planning to host an application online then chances are you will never need to use Docker. It is however a very interesting a powerful tool for ensuring consistency and reproducibility.
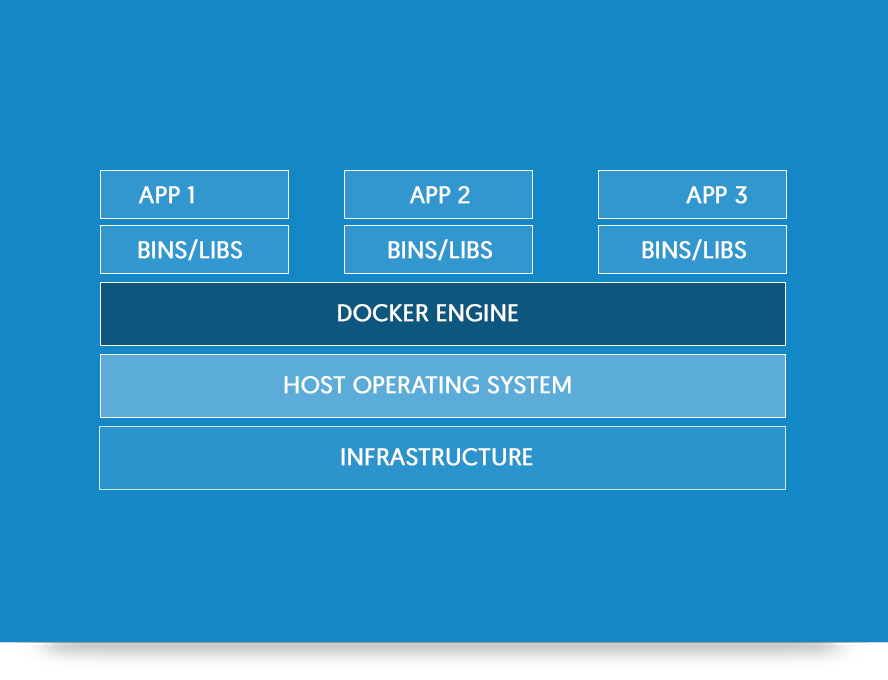
Docker is distinguished from a virtual machine shown in the schematic below. Applications and programs are contained in 'containers' which are isolated from each other and speak only to the Docker Engine. Containers can be linked to communicate between each other and share data. For example, one might have a container carrying out analysis on a dataset and another container hosting a website to display the outcomes. This has big repercussions for business, making data and systems safer against attack and easier to diagnose.
A Docker container is described by a DockerFile (similar to the environment export in Anaconda).
In short, this details the instructions to create the container - which operating system to install, which packages to install, and what data to read.
Using multiple containers requires a Docker-Compose file which describes how the containers interact and which ports are accessible.
But what use is this for a scientist? For one, if you are required to use software not available on your machine then Docker gives a lightweight means of running it. However the main draw is that in theory, equipped with a DockerFile, code, and data, anyone would be able to reproduce the same results of your study regardless of their machine and setup (provided they can run Docker). This makes Docker potentially the ultimate vessel for academic reproducibility.
IDEs
An Integrated Development Environment (or IDE), is a program to create and run Python code and provide a number of other features. The following is by no means an exhaustive list and each one will cater to different personal preferences, requirements, and patience for setting things up. I personally use a mix of all of the following, depending on the use case. Used correctly an IDE can speed up the time it takes to develop and test code as well as minimising errors.
Spyder (link)
Spyder comes bundled with Anaconda as the default IDE and is a great place to start using Python. It is functional, well maintained, and offers space to code, debug, and run as many Python/IPython terminals as you may require. The code is open-source also, meaning if you find a bug or want an extra feature then there's scope for you to fix or add it yourself.

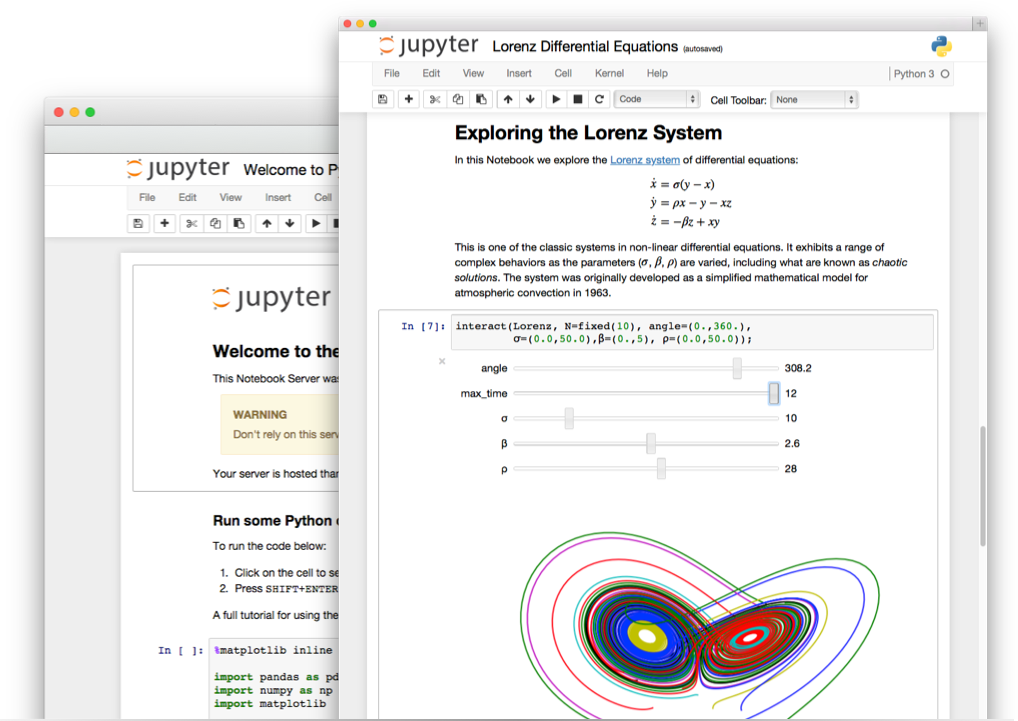
Jupyter Notebook (link)
The Jupyter Notebook (previously know as the IPython Notebook) has revolutionised how exploratory data analysis is carried out. The notebook runs in a web browser and can incorporate images, videos, tex, and raw HTML. Code is run in 'cells' which can be run independently and repeatably, avoiding the need to run an entire script every time. This quick work-flow combined with the inclusion of inline graphs and text has made the Jupyter Notebook the go-to vessel for story telling and interactive write ups. In fact, a number of books and tutorials have been written purely in notebook format, and even this blog is written in a notebook!
Other features include:
- Ability to create slideshows/presentations out of the box.
- Jupyter Notebook servers - run the computation on one machine which can be accessed from any number of others - even if they don't have Python installed.
- Other kernels can be used in the same fashion - R, MATLAB, bash, e.t.c.
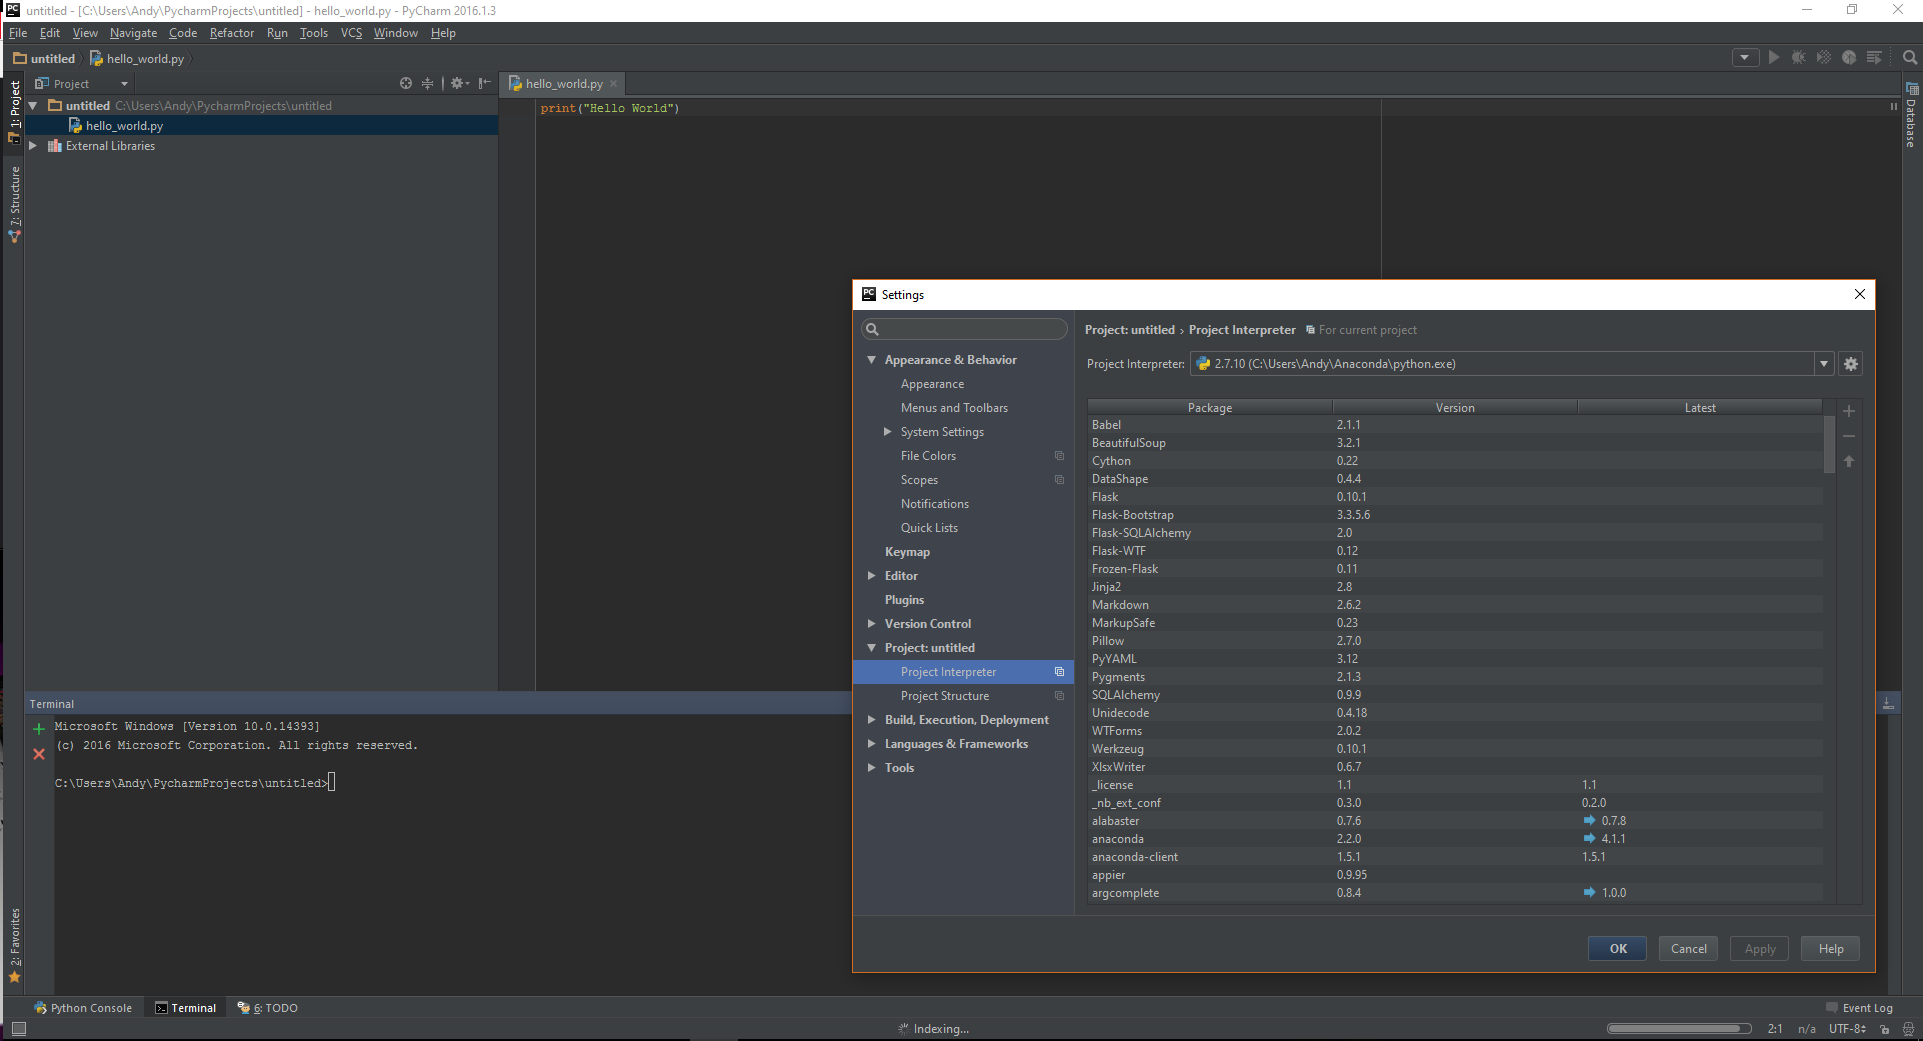
PyCharm (link)
PyCharm is the 'bells and whistles' IDE for Python. It includes everything and anything you might need whilst developing code. To name a few features there is:
- Version control integration (Git/Mercurial)
- Docker integration
- Virtual Environment integration
- Code analysis
- Code inspection
- Project management
These features come at a cost. PyCharm is a bit of a resource hog meaning it takes a while to boot up and is quite intensive when running. There is also an actual cost for using the full edition, but this can be waived with an academic email and the promise not to use it for commercial use.
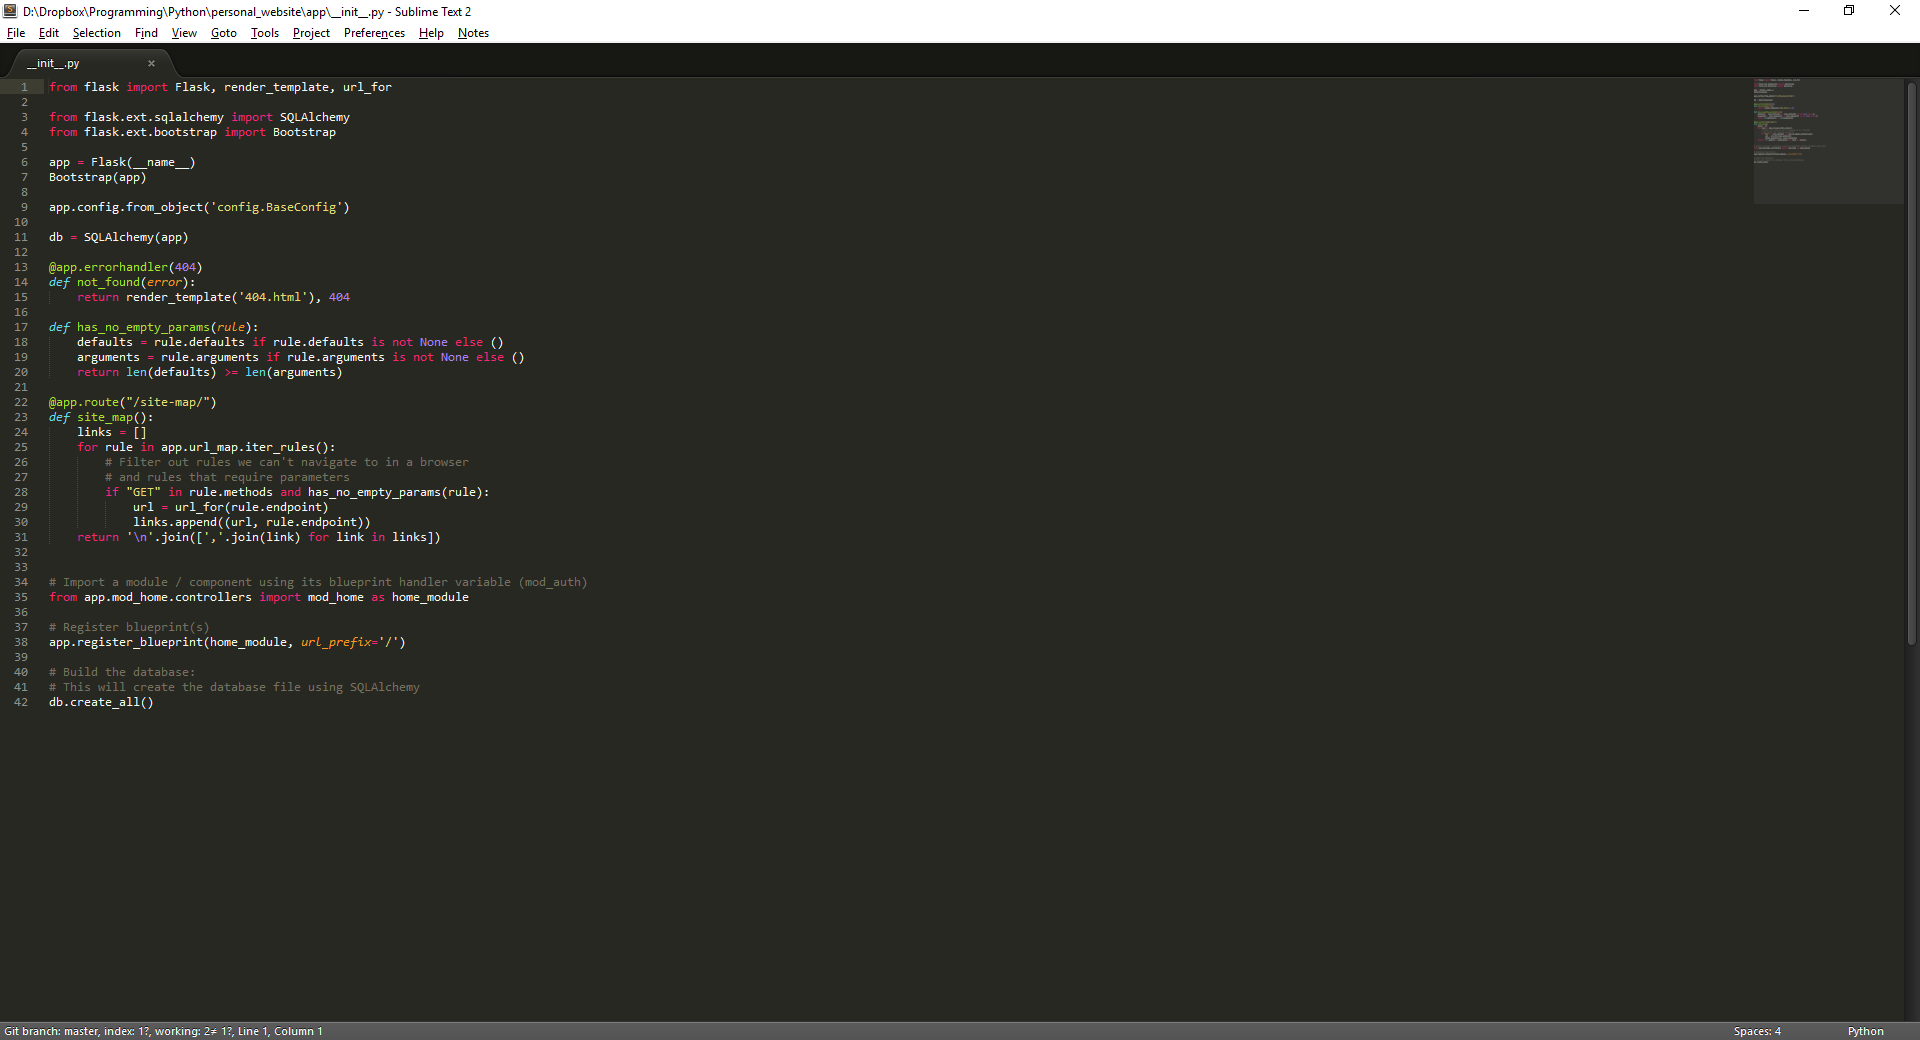
Text Editor
On the opposite end of the spectrum to PyCharm, a simple text editor offers a quick and easy way to write code. With minimal overhead there is no worrying about load times and you can go from blank slate to running code on the command line in a matter of seconds. This makes a text editor ideal for small scripts or corrections to big scripts. A downside is that you're totally unassisted (without plugins) so you should be on the ball with your syntax.
My personal favourite is Sublime Text which has a free trial version. There are plenty of plugins to download which enhance functionality to include Git integration and syntax highlighting amongst other things.
Other editors of note are vim, emacs, notepad++, and Atom.
Jupyter Lab (link)
One to watch for the future. Currently not available in package management but you can install from the Github repository if you don't mind debugging or it breaking next update. This looks to build upon the Jupyter notebook whilst allowing seamless terminal and file exploring integration, turning it into a full web-based IDE.
Conclusions
This is a short, but hopefully useful, summary of the ecosystem of tools available at the moment to help make working with Python easier and make work reproducible. Do you disagree? If so, let me know what you think is better and more importantly why in the comments below. I'm always on the lookout for ways to make my day-to-day workflow easier!
As for the future, I can see a time when something Docker-esque is used for all applications so we can live in a platform-agnostic world. This is still some way off though. For academic reproducibility we're probably even further off a solution given how little incentive there is currently to publish code and open it up to scrutiny.
Comments
comments powered by Disqus